|
|
|
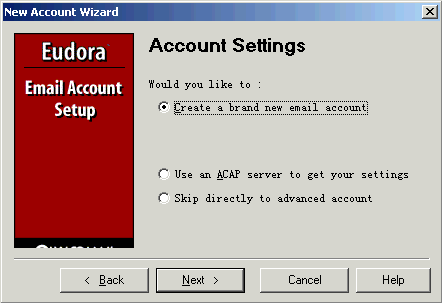
Opening and Configuring Eudora 1) Open Eudora from the Start menu or click the Eudora icon on your desktop. If you launch Eudora for the first time, After the Welcome window appears, the New Account Wizard Account Settings window appears. 2) "Account Settings"
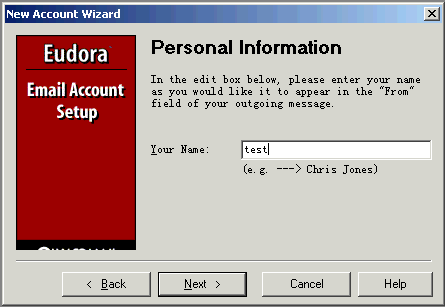
3) "Your Name" of "Personal Information"¡ªEnter your name as you would like it to appear in the From field of all of your outgoing messages from this email account, indicating to your recipients whose mail is from. Fill in and click "Next":
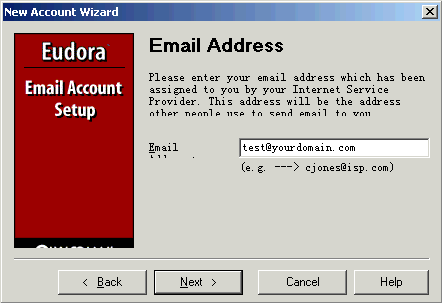
4) "Email Address"¡ªEnter the email address that has been assigned to you by your ISP or your email administrator. This is the address that other people will use to send you email. Fill in with "test@yourdomain.com" and then Click "Next":
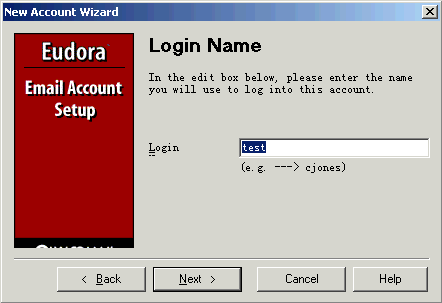
5) "Login Name" -- Enter the name that you will use to log in to this email account. This name is provided by your ISP or your email administrator, and it usually consists of the text that appears before the at sign (@) in your return email address. In the example test@yourdomain.com, the login name is test. Fill in and click "Next"
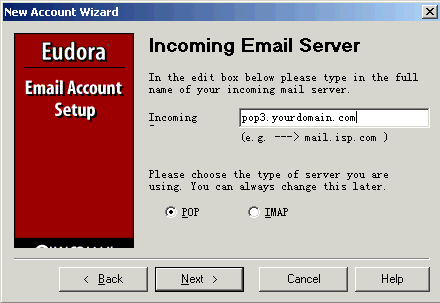
6) "Incoming Email Server" -- All of your incoming email messages are delivered to your incoming email account, which resides on a computer that runs your incoming email server. Once your messages arrive at your mail account, Eudora retrieves them to your computer. Your incoming email server must use one of the two Internet-mail communications protocols: POP or IMAP. In the edit box, type the full name of the computer that runs your incoming email server (Here, pop3.yourdomain.com). After we choose POP in the setup window, click Next:
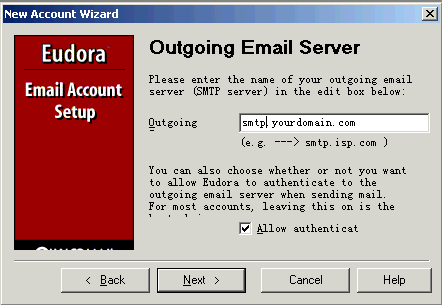
7) "Outgoing Email Server" -- All of your outgoing email messages
are sent through a specific server, usually an SMTP server. However,
your outgoing server may be the same as your incoming server. If you'
re not sure what your outgoing server' s name is, use the incoming server'
s name. And also Select "Allow authenticat", click "Next"
8) Also, you can change these settings in the Account Settings dialog, which is accessed from the Personalities window. This window lets you create alternate email accounts and edit the settings in those accounts.
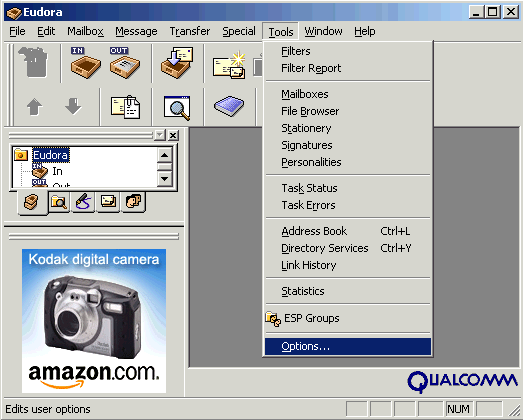
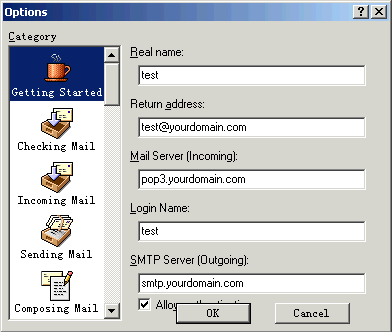
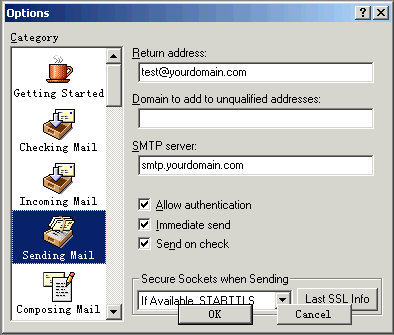
9) In the mail Options window, you can re-configure your settings.
10) Click the "Sending Mail" icon in this window, The item of "Allow authentication" should be checked
11) Click "Ok" to Finish.
|
 Use
Eudora as the email Client software to receive
and send your email messages.